In this post we will see
- What is S3
- How to Create User in AWS
- How to Configure AWS Cli Version 2 to list S3 buckets and content
So Let’s start:
S3:
Stands for Simple Storage Service. It is a Cloud based Storage Service which can hold unlimited amount of data and the data can be retrieved anytime over the web.
This data is stored in a general graphic locations called regions.
These regions contain Availability zones. These AZ’s are isolated facilities.
**Note: Data in S3 is replicated to 3 AZ’s and Amazon handles this automatically.
S3 is object based storage e.g it stores files , jpegs, pictures, pdf but not run applications. For apps we use Block devices such as EBS.
These objects are stored in bucket and buckets are created within the region. Object can be upto 5 TB in size. We can set permission on objects as well as on the buckets.
Storage Types:
Standard S3
S3 IA [ Infrequent Access]
S3 Single Zone
Glacier
Now to setup AWS Cli to access S3 content:
1) Create an IAM User
2) Give this user S3 -Access let’s make him S3Admin
3) Get his Access key and Secret key from Security Credentials
Creating an IAM user:
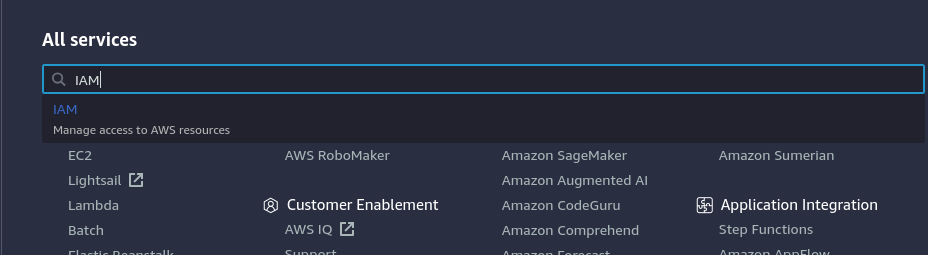
To create an IAM user login to AWS Console and type IAM in the search bar as shown below and click on IAM.
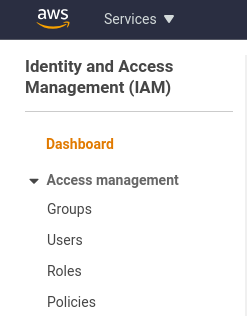
Now Click on Users as show below
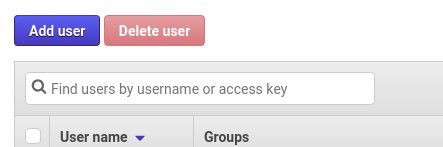
Now click on Add user
Then give details as show below
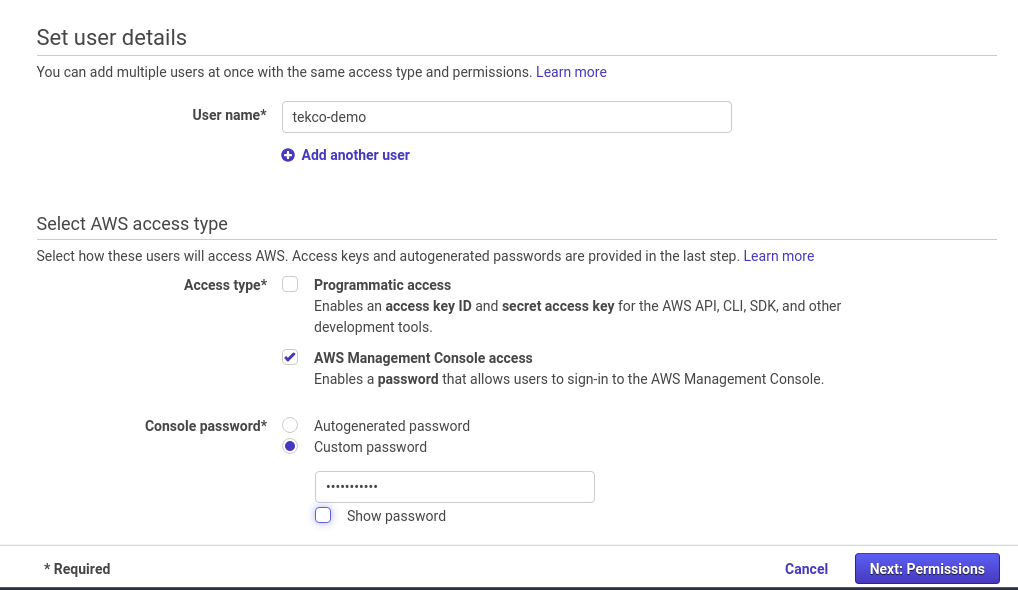
Note: You can Check Access Key box here or later. Now Click Next and then Click on Create group.

Now give group a name e.g “tekco-s3 ” as show below and from policy filter type S3 and select AmazonS3FullAccess
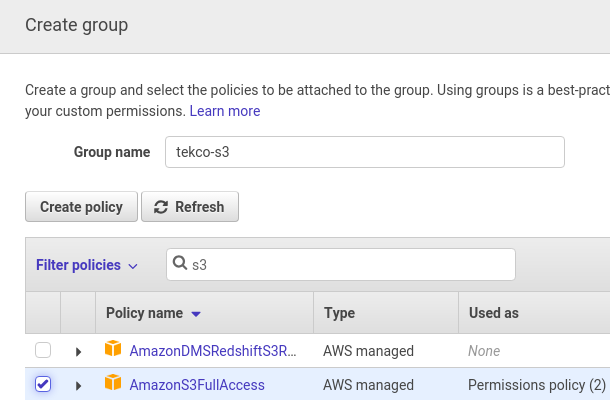
Then click Next and click on create group.
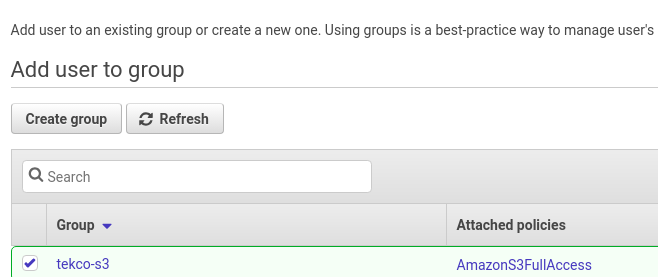
Once you have clicked on create the group, you will be presented with the following screen. If all is as per your desire click finish.
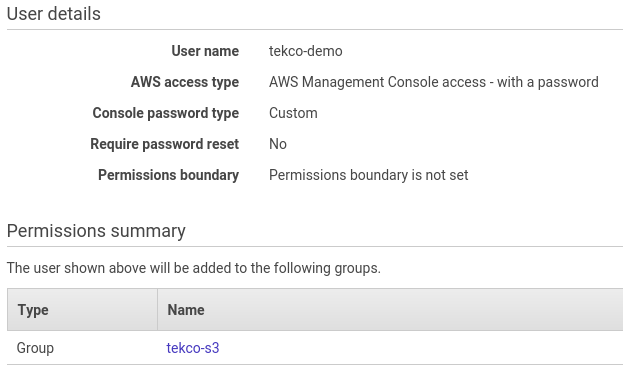
Click next and you will receive a success message for your new user.

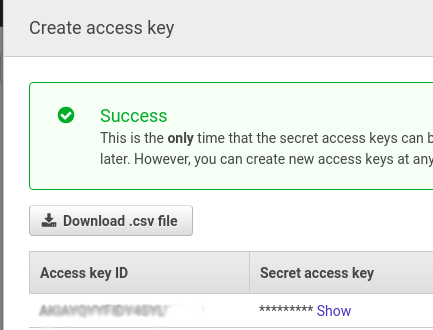
Now once the user is created, click on Security Credentials and , then create “Access Key”
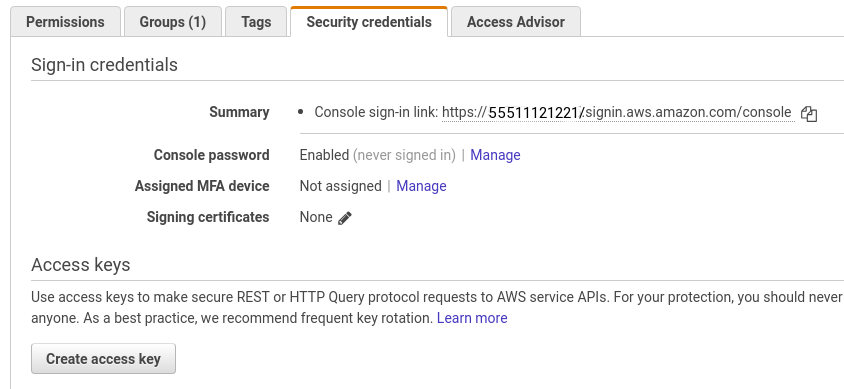
Once you click on Create access key , You will see Access key and Security key. Please save these keys and move to next step of Configuring AWS Cli Version 2
Now Let’s Configure our AWS Cli Version 2
To configure aws cli to access S3 go to your linux terminal and type the following:
root@Red-Dragon:/home/salman# aws configure
It will ask you to provide with Access key, Secret key and the region ( You have all the information when you created the user earlier)
AWS Access Key ID [None]: AKIAYQYYFIDYUMHTUMHC
AWS Secret Access Key [None]: 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
Default region name [None]: us-east-1
Default output format [None]:
root@Red-Dragon:/home/salman#
Thats it, our AWS Cli is configured for S3, to confirm that issue the following commands:
root@Red-Dragon:/home/salman# aws s3 ls
2019-11-28 00:08:55 itpings2000
2020-01-04 21:37:18 tekco2020
root@Red-Dragon:/home/salman# aws s3 ls s3://tekco2020
2020-01-04 21:39:25 70522 Kubernetes-Install.pdf
We can see that the content is listed and our bucket tekco2020 contains Kubernetes-install.pdf , let’s verify this by checking S3 from AWS S3 console
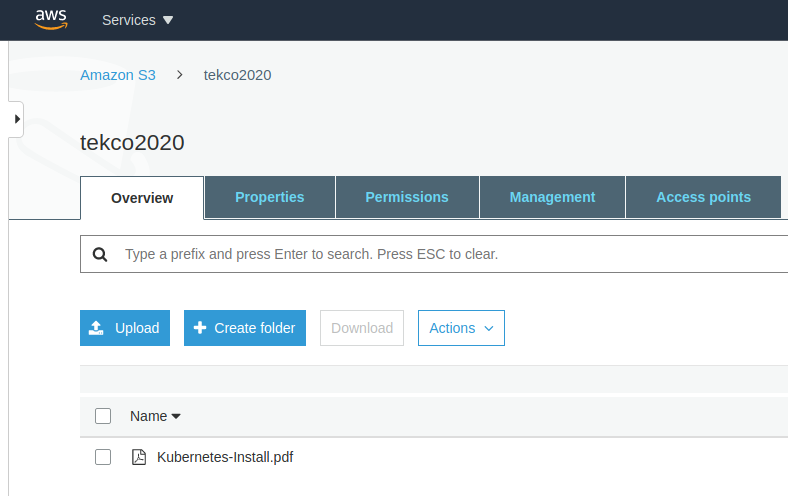
As we can see above it does shows the same content as seen from Cli.
Let’s create a bucket from AWS CLI with aws s3 mb command.
root@Red-Dragon:/home/salman# aws s3 mb s3://tekco-demo-2020
make_bucket: tekco-demo-2020

root@Red-Dragon:/home/salman# aws s3 ls
2019-11-28 00:08:55 itpings2000
2020-10-01 23:47:17 tekco-demo-2020
2020-01-04 21:37:18 tekco2020
Let’s go to our AWS S3 Console and check if the bucket is being created.
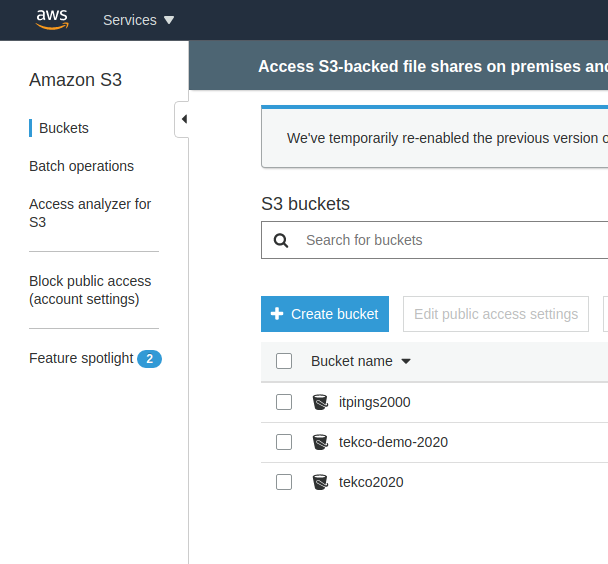
Perfect, we have successfully created our bucket from AWS Cli.
Thanks,
Salman Francis
https://www.youtube.com/linuxking
https://www.tekco.net